GeTech – sensor-based check gauges for pipes
Perfectly bent?
Pipelines are the lifelines of systems that provide planes or cars with oil, fuel, coolant or other fluids. They often have to be bent into complex three-dimensional shapes in order to fit into confined spaces and efficiently connect units and containers. Effective quality control is essential to ensure that everything can be assembled cleanly and all connections fit perfectly. Prior to installation, special fixtures are used to check that the bends and lengths conform to the specifications. Only then can a smooth integration into the overall system and the durable efficient functioning of these complex pipes be guaranteed.
GeTech, a Dutch company based in Westerbork, specialises in the development, production and distribution of check fixtures, which are used to check such pipes for geometry.
GeTech Managing Director Alco Poppinga explains: “We manufacture check gauges for the automotive and aerospace industries. The tube to be checked is placed in our fixtures and mounted in the same way it will later be installed in a car, for example. It’s a quick and reliable way to check whether a product is within the tolerance limits.”
GeTech develops the check gauges in their own CAD laboratory. The robot-assisted production process using modern machine tools is also handled internally, as is the precise check on their in-house measuring system.
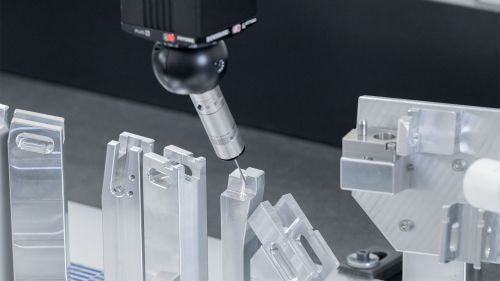
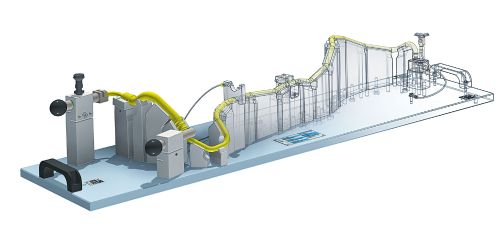
Image 1: Each individual support element is precisely measured in the in-house measurement laboratory.
Image 2: Example of a check gauge with inserted pipe.
Alco Poppinga: “We produce our gauges according to our customers’ high expectations. Currently, we are in the process of automating our production with robots. This ensures a high output of our products.”
Each check fixture is customised to the pipe to be checked. For this purpose, aluminium blocks are lined up and stacked on an aluminium base plate. The resulting “stilts” serve as support points for the product. Their height and orientation are calculated with accuracy to a fraction of a millimetre. The top of the blocks has a milled groove into which the pipes or tubes to be checked should fit perfectly without tension.
Optionally, the gauges can be integrated into the GeTech Product Inspection System (GPI) as a modular component. This system consists of sensors, a screen-based dialogue system and a control unit.
Alco Poppinga describes the GPI inspection process: “When the user has checked into the system via RFID chip, the right test sequence is automatically loaded and indicated on the display. The user is guided through every step of the process and is given instructions, for example, on how to insert the pipe into the check fixture and close the clamps.”
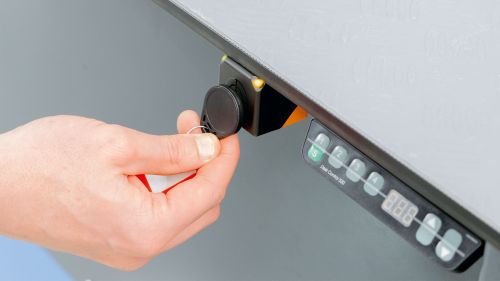
The user checks into the system using an RFID chip. This way, it is documented who carried out the inspection process.
Sensors monitor the process
The inspection process is monitored with the help of several products from the sensor specialist ifm. For example, their inductive sensors are installed on the toggle clamps to ensure that all required levers are closed correctly. Only then will this operating step be released. The inductive IY type sensors have an even smaller design. For example, they are embedded in the flaps which report the correctly seated position of the product to the controller. Thanks to their compact M5 design, they are particularly space-saving.
To detect the presence of certain parts, such as the O-rings at the tube ends, photoelectric sensors are used. In this application, the miniature diffuse reflection sensors of the O8H series score with their compact size and a precise light spot even at long distances.
Another important sensor system is the O2D contour sensor, which detects the actual contour and compares it with the target contour defined in the test program. Values outside the tolerance limits are recognised as faults.
Alco Poppinga: “We use the contour sensor from ifm to check the fill valves on air conditioning lines. These filler necks can differ from country to country. By checking their contour, the camera-based sensor verifies whether the correct country version has been installed.”
To confirm a successful product test, a label with a barcode is printed and affixed to a specific part of the test tube. A camera-based code reader from ifm checks whether the right label has been applied in the right place. The product is then approved and released for removal.
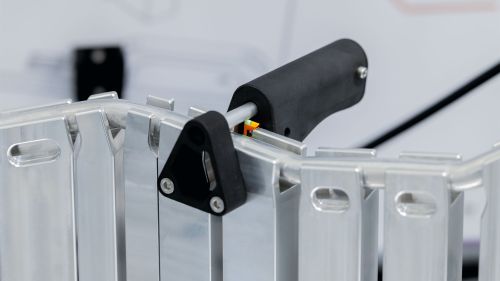
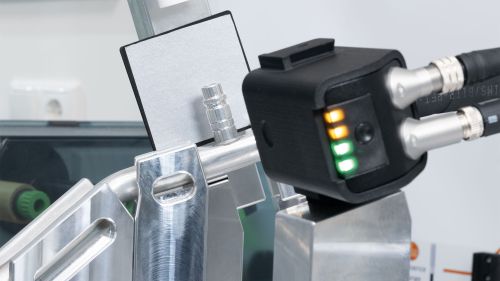
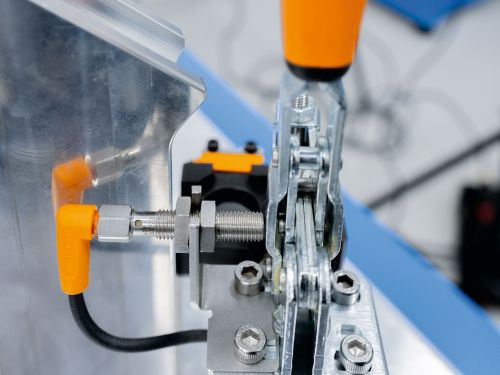
Image 1: One of multiple optical sensors detects that the tube has been placed in the fixture. The lock is released once all steps of the quality check have been passed.
Image 2: ifm’s contour sensor inspects the country-specific fill valve of the air conditioning tube.
Image 3: Inductive sensors detect the position of the toggle clamps.
Modular concept
The sensor setup of the measurement system depends on the test requirements of the specific product.
Alco Poppinga: “The GPI is a work station which allows users to easily exchange the check gauges via a plug-in connection. Most sensors are permanently installed on the levers and clamps. The contour sensor or the QR code reader remain at the work station because we can quickly adjust them to the application using the free and convenient ifm Vision Assistant software. This also helps reduce the production costs of the gauges, which benefits our customers.”
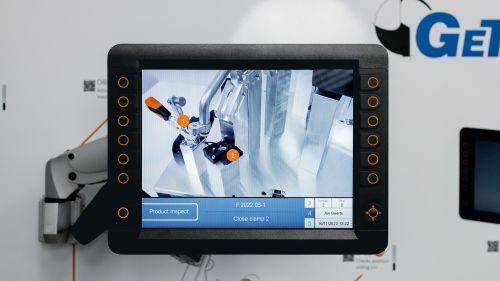
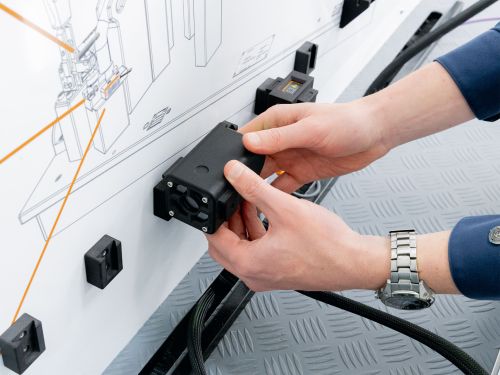
Image 1: The user is guided through every step of the process. This ensures an efficient and error-free test sequence and eliminates the need for lengthy preparation in case of changing check fixtures.
Image 2: The variable sensors, such as the contour sensor shown here, are modular and can be connected to various check gauges. This saves costs.
Partnership with ifm
GeTech relies on products from ifm, both in terms of sensors and dialogue displays. Alco Poppinga explains why GeTech now also uses the industrial sensors for quality control: “In 2016, one of our customers approached us because they had received complaints about the tubes missing certain parts. Together with this customer, we analysed the problem and had the idea to use sensors for support. In the same year, we met ifm at an exhibition. We brought up our customer’s problem and quickly realised that we would be a good match. ifm provided us with some sensors and a programmable display to test our ideas. The products convinced us, which is how the GPI was born– a work station for easy connection and exchange of check gauges.”
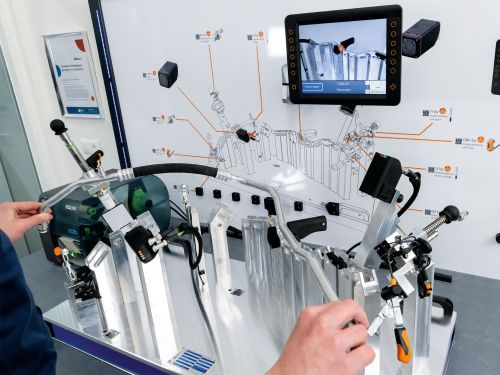
The three-dimensionally bent air conditioning tube is placed into the check fixture for quality inspection.
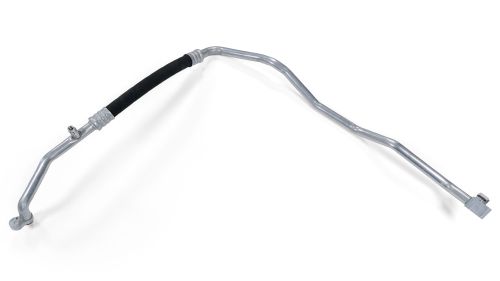
A vehicle air conditioning tube to be checked.
Conclusion
Sensors from ifm help secure the manufacturing quality of complex pipes. They reliably detect defects that may be overlooked in a purely manual inspection process. An easy-to-use dialogue system ensures efficient inspections and highest product quality.